This tutorial will guide you through all the steps required to replicate the Commerce Marketplace demo site on your own server, and then explain how its behaviour differs depending on various configuration settings.
If you have already installed and configured your marketplace site before, you might skip directly to the usage walkthrough.
Installation
Start with Commerce Kickstart installation profile (I'd suggest version 1.x, especially if you prefer to have a clean install without all the extra fancy add-ons introduced by Kickstart 2.x, also, 1.x is the version I am developing this on and testing it with, so all the screenshots have been done on it as well).
Install Drupal using Kickstart profile, but without example products and product display nodes.
Enable all modules in Commerce Marketplace group (well, almost all, this example excludes Chained Payment Method Example):
drush en -y commerce_marketplace commerce_marketplace_cart commerce_marketplace_checkout commerce_marketplace_customer commerce_marketplace_line_item commerce_marketplace_order commerce_marketplace_payment_parallel_example commerce_marketplace_payment commerce_marketplace_product commerce_marketplace_shipping commerce_store commerce_store_ui
Note that when commarce_marketplace module is enabled, it automatically creates the merchant role with some pre-set permissions, aimed to be used for merchant users. You might want to review those permissions before starting to use them.
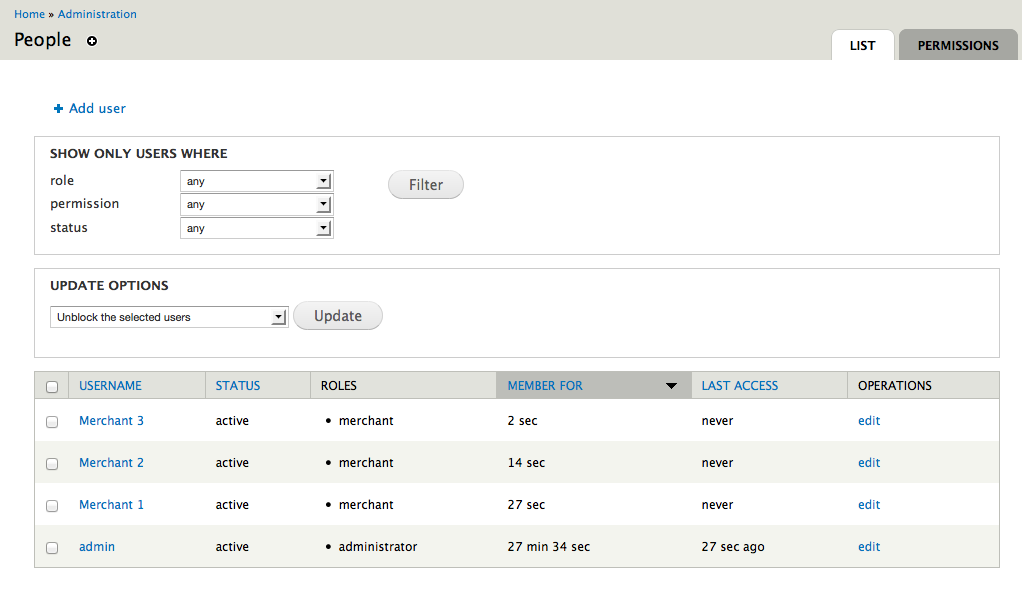
At Administration » People let's create 3 example merchant users (in this case: Merchant 1, Merchant 2 and Merchant 3), and assign them to the merchant role:
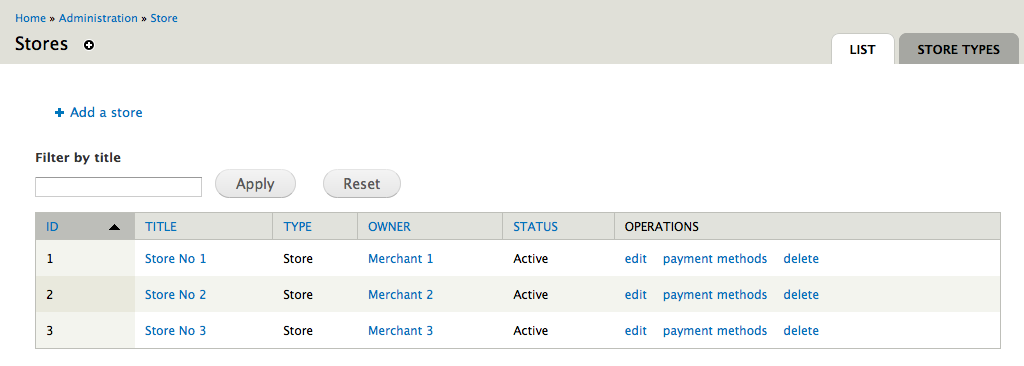
At Administration » Store » Stores let's create 3 example stores, assigning them a relevant Store owner from users created at previous step:
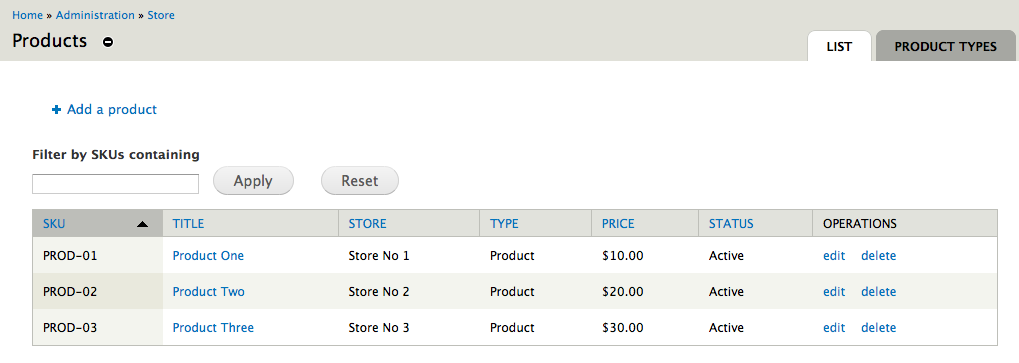
At Administration » Store » Products let's create 3 example products, again assigning each one to a relevant store created at previous step:
Ok, let's actually throw in another one for a good measure, which won't be assigned to any store:

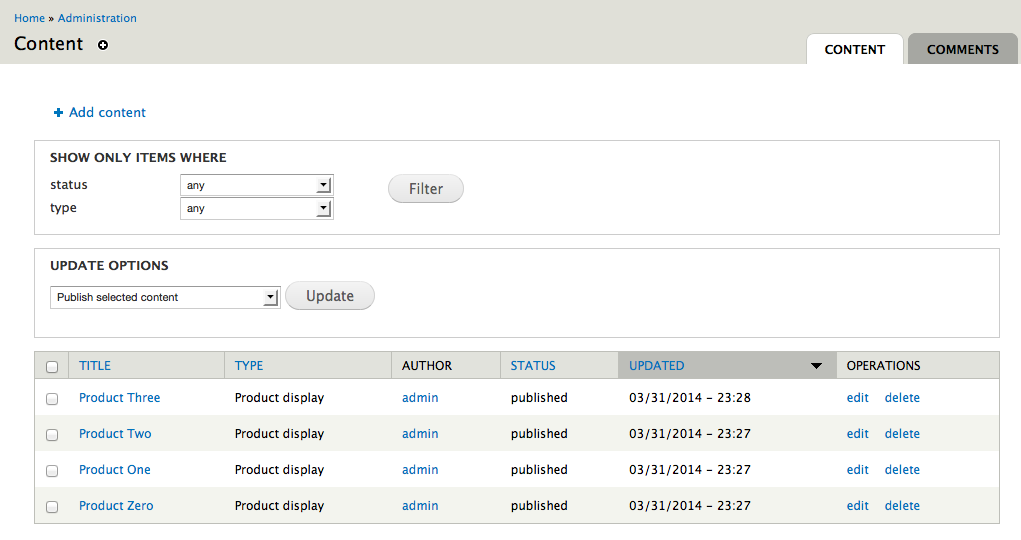
For each of these products, let's create a relevant Product display in Administration » Content » Add content » Product display:
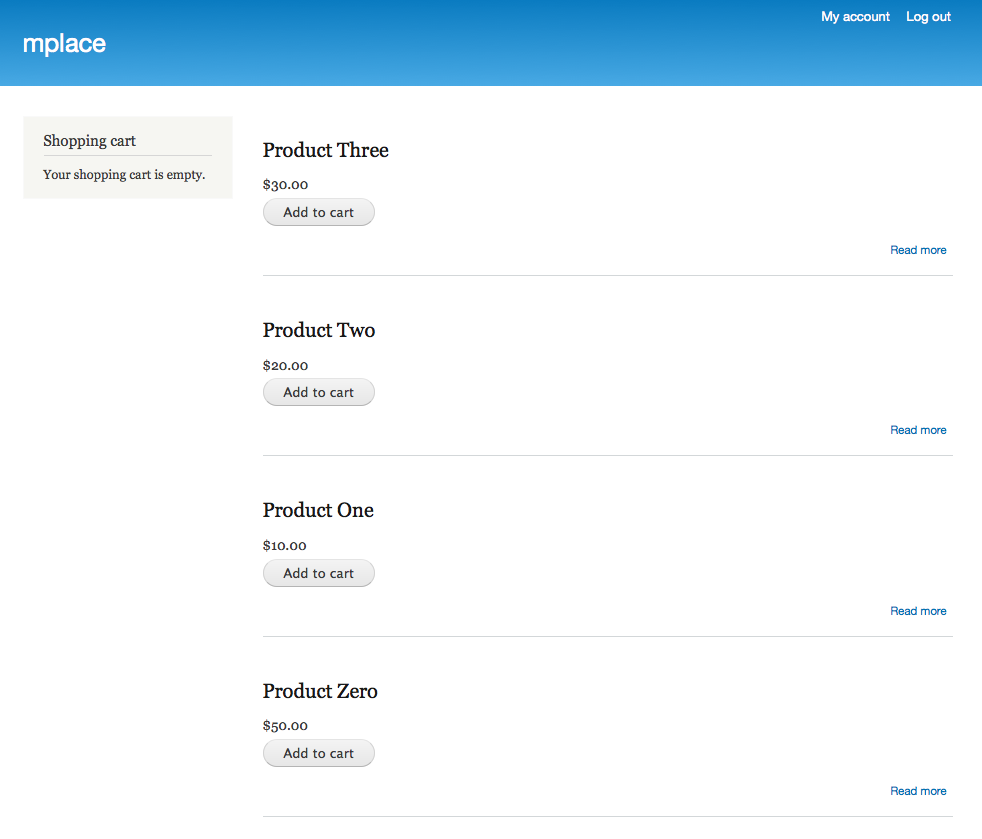
This gives us very basic product listing on site's front page:
Enable few selected modules providing payment methods - in this example we will use Authorize.Net and Paypal WPS, plus additionally Custom Offline Payments to manually define few extra offline payment methods:
drush dl commerce_authnet commerce_paypal commerce_cop
drush en -y commerce_authnet commerce_paypal_wpp commerce_cop
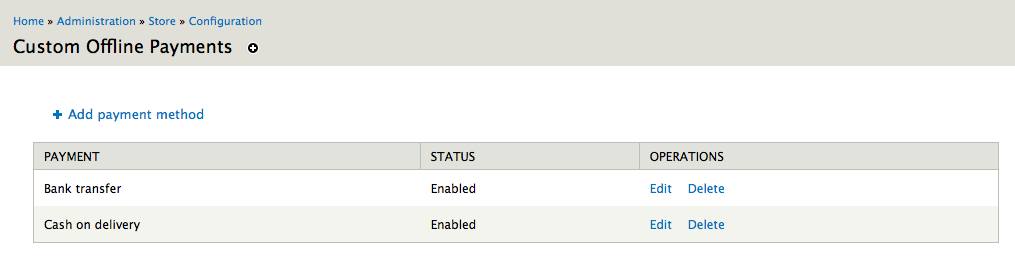
At Administration » Store » Configuration » Custom Offline Payments let's define 2 example offline payment methods: Bank transfer and Cash on delivery (please do fill in the Information field):
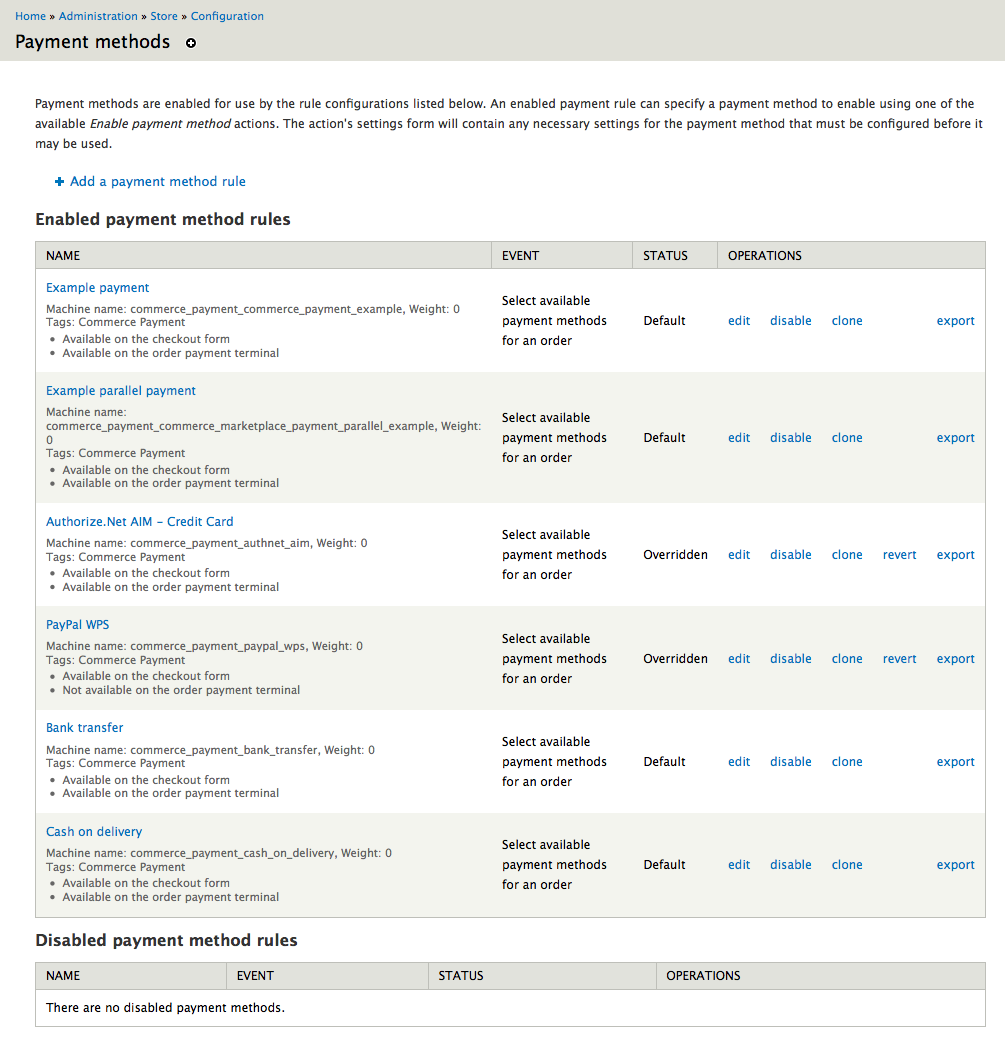
You should be able to see them at Administration » Store » Configuration » Payment methods (you might not have all of them enabled yet, so this would be a good moment to enable all those you are planning on using):
Now, Example payment and Example parallel payment methods do not need any configuration.
In case of both offline payments methods, Bank transfer and Cash on delivery, if you filled in Information field when creating them, you have them configured too.
What's left is Authorize.Net and Paypal WPS - if you have sandbox/test accounts with them, provide their details now. If not, well, why not to get them now?
- At Administration » Store » Stores, let's first edit each store and enable few (different) payment methods for each one, then configure them:
for Store No 1, on Payment methods vertical tab, let's enable Example parallel payment and Bank transfer:
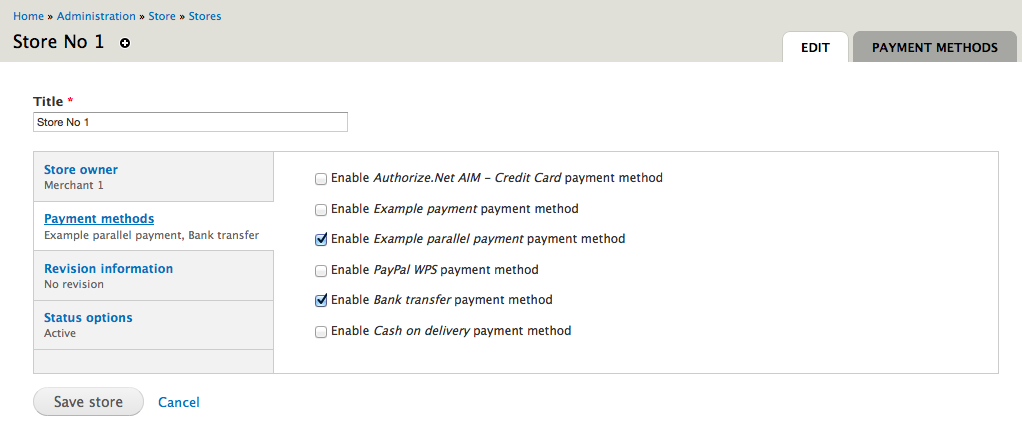
After saving, there will be 2 relevant links active on the Payment methods tab:
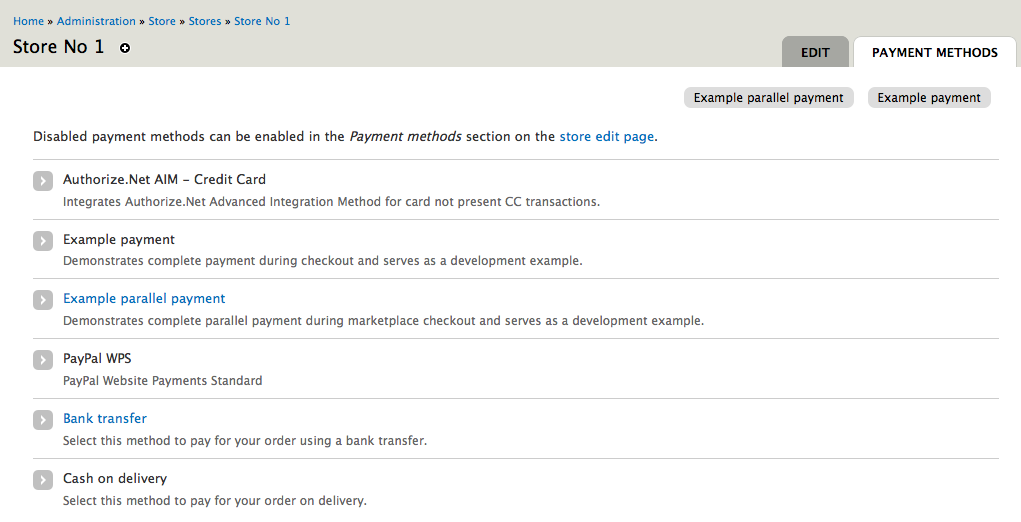
Again, Example parallel payment does not have any configuration, but Bank transfer can (and should) be configured for this store before it can be used (note that this is completely independent from general payment method configuration done either in step 11 or 13):

for Store No 2, enable and configure Example parallel payment, PayPal WPS and Cash on delivery
finally, for Store No 3, let's enable just Example payment method.
- Finally, let's add few shipping services at Home » Administration » Store » Configuration » Shipping (you might need to enable
commerce_shipping_uiandcommerce_flat_ratemodules first if you haven't done that before).
For example:
Standard shipping with Base rate of 10 USD
In configure component we need a condition to add this rate to an order only if total amount of the order is lower than 50 USD (otherwise we will offer Free shipping service instead) - which means adding a Data comparison condition where
commerce-order:commerce-order-total:amountis lower than 5000: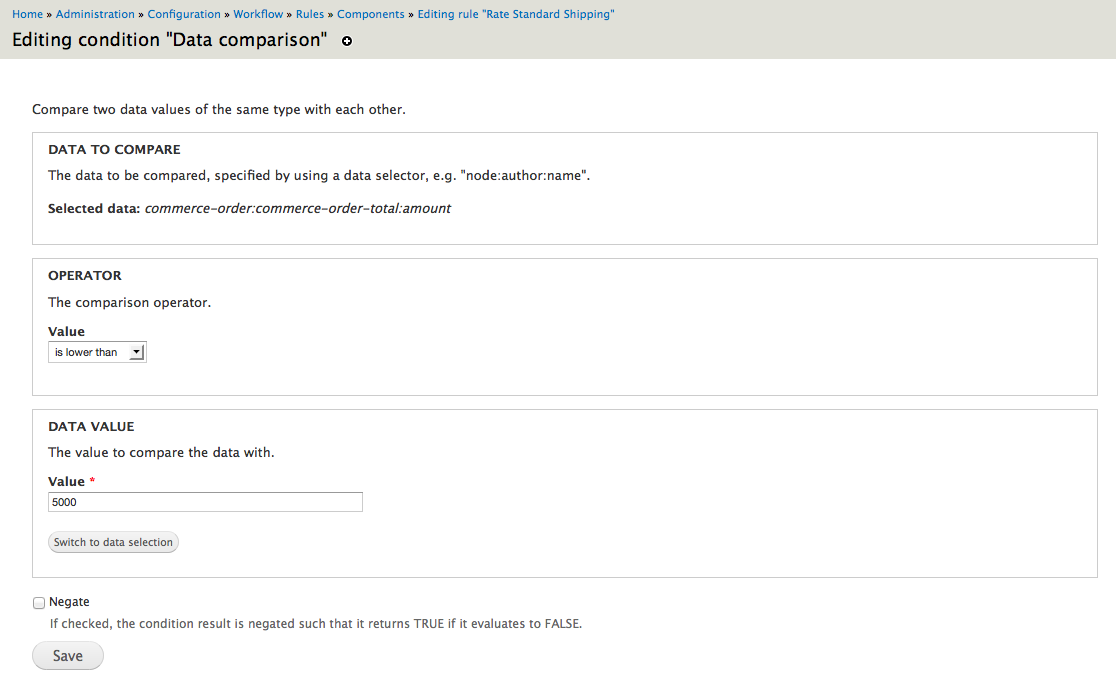
Priority shipping with Base rate of 15 USD
Free shipping with Base rate of 0 USD
Here we need a similar condition as for Standard shipping, this time though making sure that order total amount is equal or higher than 50 USD (which means that
commerce-order:commerce-order-total:amountis higher than 4999).
Usage
Let's start with adding 3 products created earlier (Product One, Two and Three) to the shopping cart. Even though they belong to different stores, they are displayed together to the customer in the Shopping cart block:

Same applies to the Shopping cart page, with an additional column added here showing which store each product comes from:

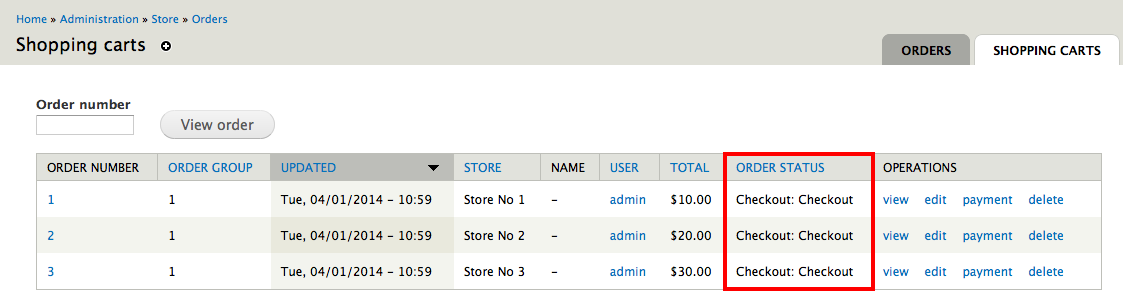
Behind the scenes however 3 separate order were created - one for each store:

Marketplace introduces concept of an order group (adding a property of the same name to the order object), so that it knows which multiple orders need to be processed together:

Note how, when you progress to the next step in the checkout process, all 3 orders are being updated simultaneously:
Now, remember how, when we enabled payment methods for all 3 stores, we enabled Example Parallel Payment for Store No 1 and No 2, but we haven't done it for Store No 3?
This means that those 3 stores, from which we are ordering right now, do not have any common parallel payment method, therefore we will need to select different payment method for each one separately, and go through the payment process 3 times.
This also means that:
Shipping pane cannot be displayed on its standard Shipping page, which was removed
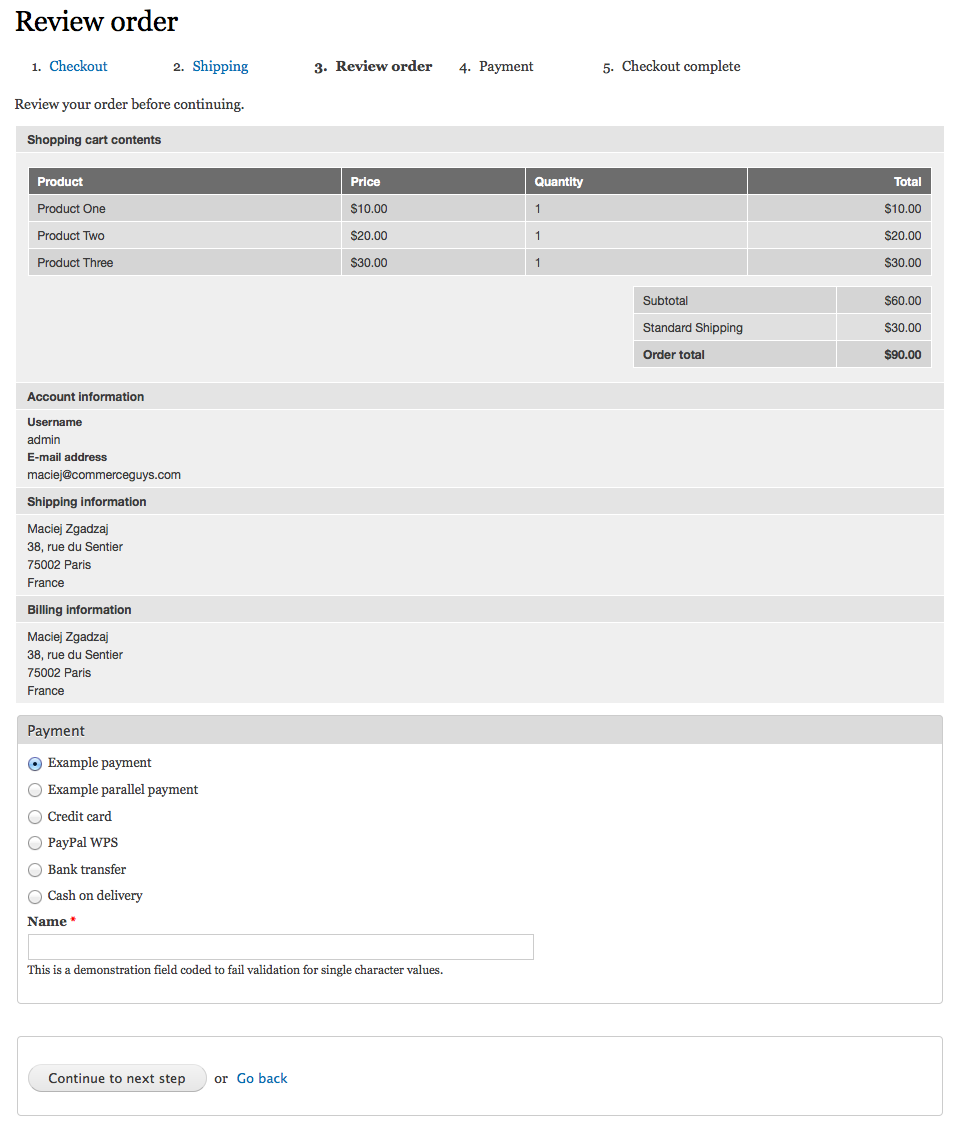
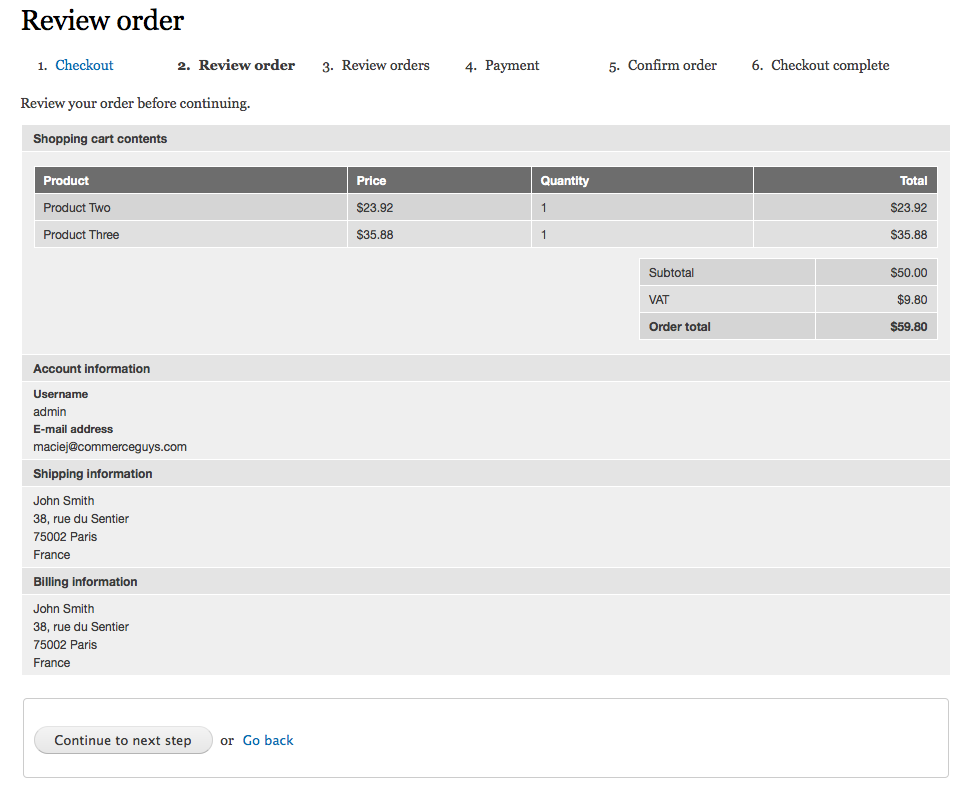
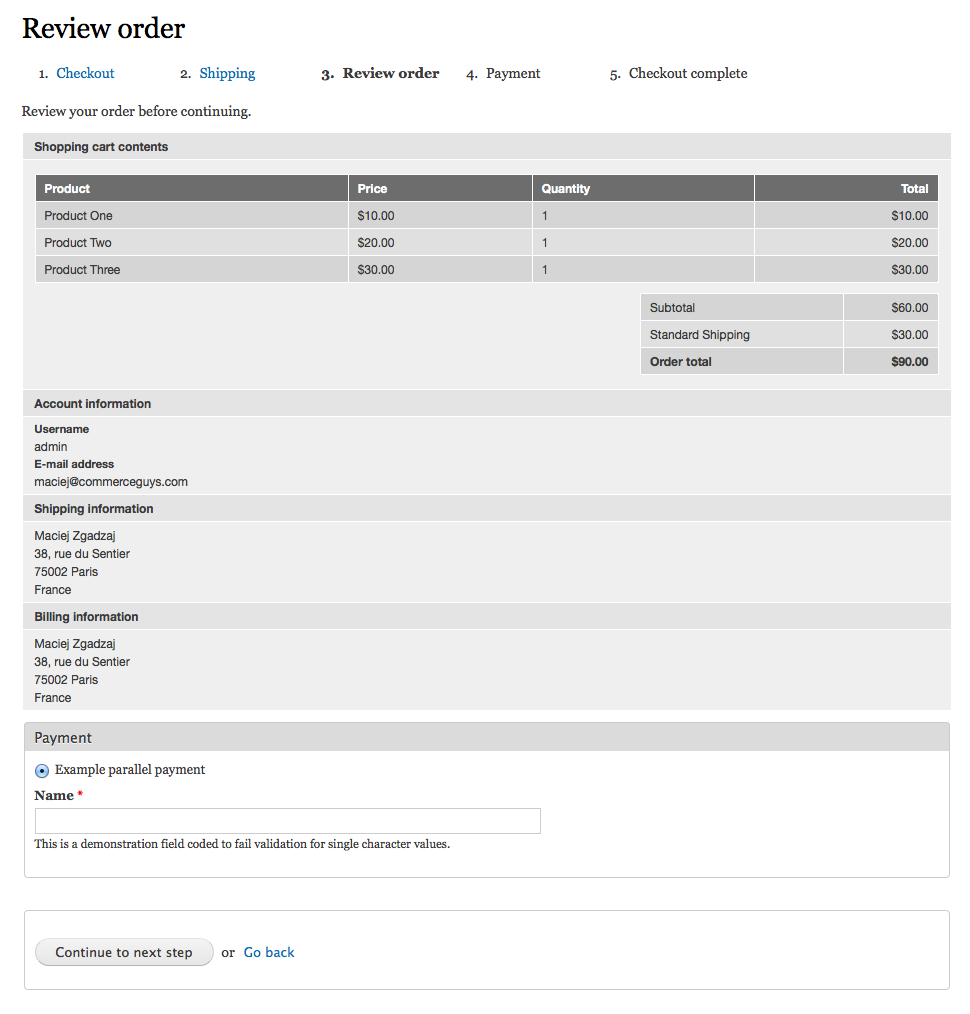
Payment pane cannot be displayed in its standard place on the Review order page:
new checkout page Review orders was automatically added, displaying both Shipping and Payment panes 3 times, for each order:
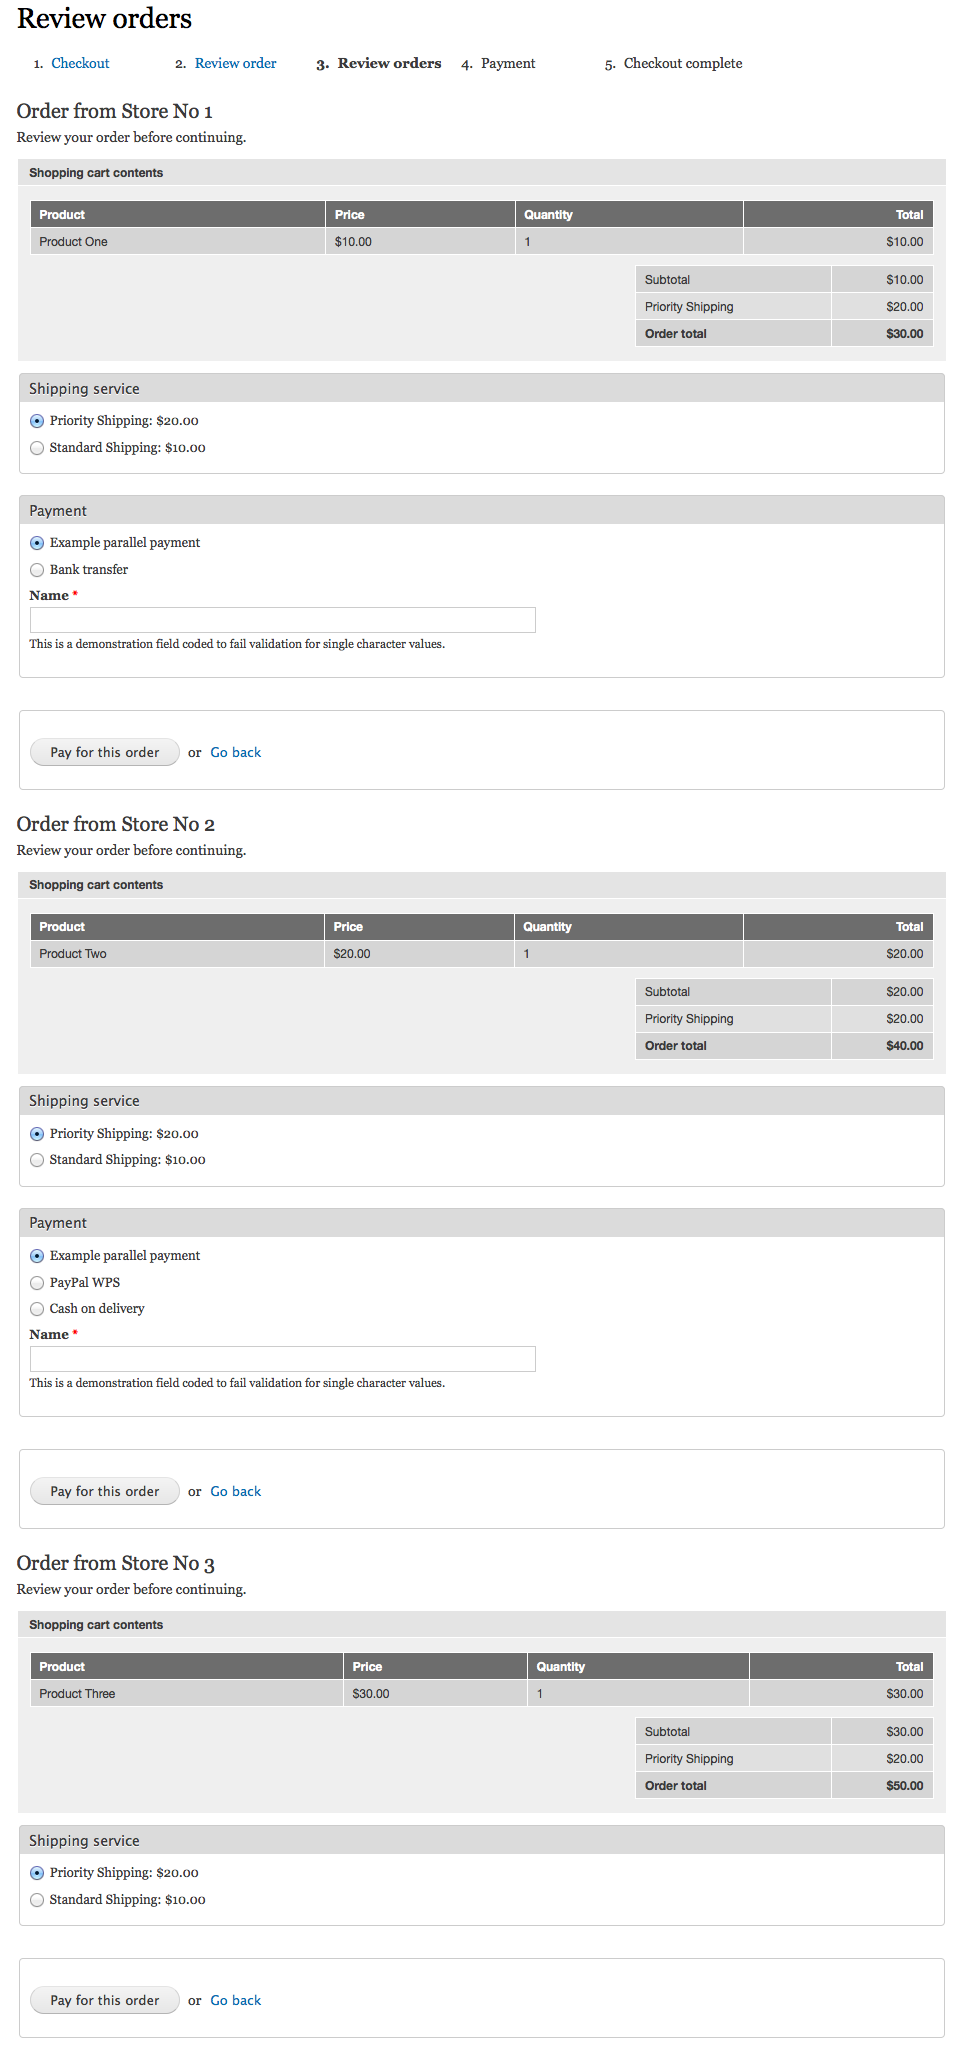
Note that in this situation both Shipping and Payment panes are ajaxified - changing their values will automatically update their respective Shopping cart contents view.
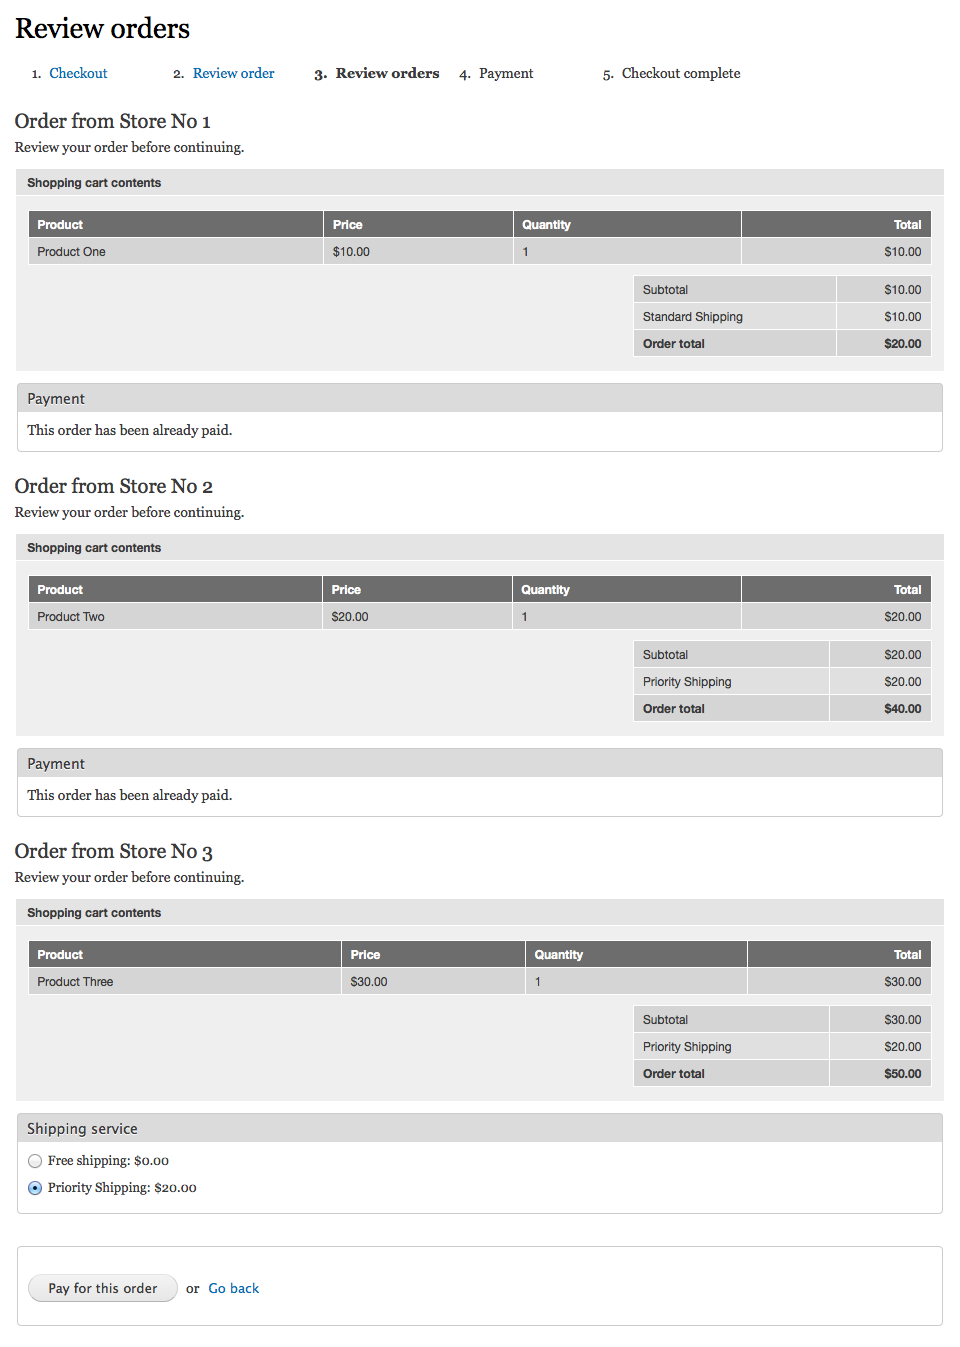
When stores do not have any common parallel payment method, the payment for each order needs to be done separately. Here, 2 order have already been paid for:
For each of those completed orders you also should have received the confirmation email.
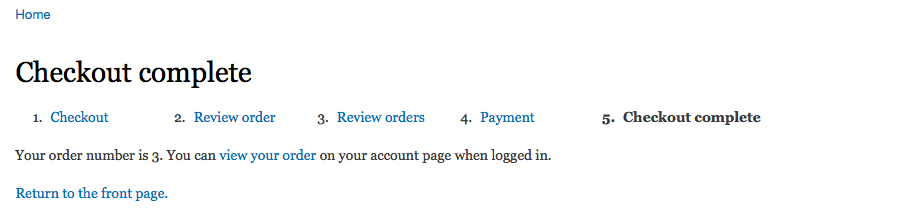
Finally, only paying for the last, 3rd order, will take customer to the Checkout complete page (which is not yet modified for the marketplace needs, and still displays information for the single, just completed order only):
Backstage, all 3 orders were updated correctly and waiting now in Pending status for further processing:

PLOT TWIST #1
Let's enable Example parallel payment method for Store No 3 as well, and restart our shopping experience in the same way as above.
Note how the checkout process has changed compared to before:
Shipping pane is displayed again on its dedicated Shipping page. (And this is something that still needs to be worked on, as I have already mentioned in my previous blog post.)
Payment pane is again displayed on the Review order page, offering only parallel payment method(s), and only those which are common to all stores from current order group.
There is no Review orders page anymore:
This situation is very close to the standard way in which Drupal Commerce normally works, with the main difference being available payment methods.
PLOT TWIST #2
Now let's configure payments to be sent to the main store again, instead of merchants (at Administration » Store » Marketplace » Payments).
All checkout pages will get (almost) the same configuration, and this time it would be exactly the same as standard Drupal Commerce.
The difference in comparison to previous plot twist is that in this case, regardless of the number of orders in the order group, there will always be only one payment being sent, using main payment method configuration defined in rules settings.
This also means that customer will have all payment methods enabled site-wide at their disposal: